Acronis True Image 6.0

Introduction
Let’s face it. Backing up your computer isn’t the most easy thing to do. You know you need to do it but how often do you do it? How many times have you lost data because you didn’t take care to back it up?
As much as I tell my friends, family and clients to backup their data and systems, I have been the victim of data loss enough times for me to seek out a program that can backup my entire system and get me back up and running without too much fuss. Additionally, I needed something that would work with the numerous external storage devices that I typically use.
Now there are a lot different kinds of backup programs. There are ones that backup individual or groups of files and there are others which backup entire system volumes, partitions and drives. I actually suggest using both kinds to backup data but in this case I’m going to cover one that backs up entire drives which is useful for full recovery.
When I was rolling out thousands of enterprise desktop systems using disk imaging software, Ghost ruled supreme and was very powerful; however, it was definitely not designed for home users and while it supported network shares well, it didn’t support external storage devices and lacked an easy-to-use interface.
Later on, Powerquest burst onto the scene with their Drive Image software. While much more user friendly and consumer oriented, Drive Image still had limitations like Ghost. Both programs required you to boot into DOS mode in order to perform the system image. Of course, once it DOS mode, the number of usable storage devices and network connections was reduced dramatically. Despite numerous version upgrades and better interfaces, neither program made great strides in compatibility with emerging storage products.
Enter Acronis True Image 6.0, a program that totally ups the ante in the drive imaging software arena.
Acronis True Image
When first heard about True Image and what it could do I was immediately intrigued and baffled. I was intrigued because this program has a unique set of features. Acronis True Image is designed to be the “ultimate data insurance policyâ€. In the words of Acronis,
[True Image] takes an exact image of your hard disk or separate partitions for a complete backup, and allows you to restore all of their contents, including operating systems, programs, personal data and settings. In the event of fatal software or hardware failure Acronis True Image protects your data, even when ordinary file backup software does not work.
Some of the unique features of True Image is its ability to transparently create images while you’re in the operating system. Although Acronis recommends you’re not doing too much stuff, it can make a full image of your drive while you’re working. Not only does Acronis achieve this magic but they do so with an easy to use interface that’s simple to navigate and lets you achieve your results with only a few clicks.
I was baffled by True Image because I had never heard of it and it was already on version 6.0. Perhaps the earlier versions of the software weren’t noteworthy but I was definitely surprised to find out about this software and it’s definitely a mature product with some nifty features.
Boot Magic
In addition to the groundbreaking “transparent backup†feature, Acronis also allows you to backup the system without booting into the operating system. To achieve this, Acronis helps you create a boot disk on floppies or a CDRW. This boot disk loads an interface almost completely similar to the Windows client making it extremely easy to use. In addition, this boot environment also supports all of the interfaces the Windows client does. But wait, there’s more. The interface also supports shared drives on a network as well.
So, how did they do that? Unlike its counterparts, it doesn’t use a flavor of DOS to access the drive. Instead, Acronis has shrewdly used a customized version of Linux and a customized operating environment closely mimicking its Windows counterpart. The benefit of Linux is its inherent stability and performance over DOS. In addition, Linux supports many more devices and interfaces than DOS making it very compatible with newer devices based on USB or Firewire. Linux also allows Acronis to access Windows drive shares via a Samba interface. Simply put, the boot disk is brilliant and well executed.
Compatibility
True Image supports a wide variety of storage devices and network connected shares. The list of supported devices can be summed up with the following list:
• Hard disk drives
• Network drives
• CD-R(W)
• DVD-R(W), DVD+R(W) (with 3rd party software)
• ZIP, Jazz and other removable media
• IDE, SCSI, IEEE 1394 (FireWire), USB 1.0 / 2.0, PC card storage devices.
I’ve tested the software with hard disks, networked shares, internal and external CDRW drives, external Firewire hard disks, and external USB2 hard disks. With all of these devices, the software has performed admirably.
How It Worked for Me
So how does it work? I’ll go through a typical backup scenario so you can see how easy it is to use.
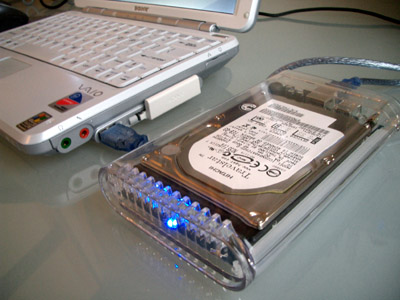
In this scenario, I want to backup my Sony VAIO PCG-TR1AP notebook with an external portable USB2/Firewire hard disk. This is convenient because it’s probably the fastest way to backup my notebook drive.
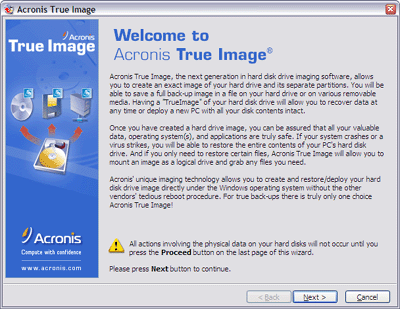
You are first welcomed to the program which is basically one big wizard that takes you through the steps to create a backup or restore a partition or drive.

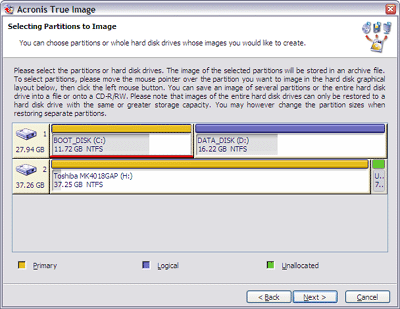
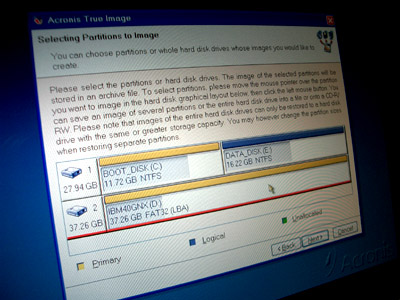
So, in this case I want to make a backup of my main boot partition just in case my system fails or gets corrupted and I can completely restore the entire thing and be back up and running without needing to reinstall all of my apps. True Image will display all drives visible fixed drives. In this case, I have my notebook’s 30GB drive (split into two partitions) and my external USB2 40GB hard disk. In this case, I’m going to backup the active boot partition while I’m still using Windows.
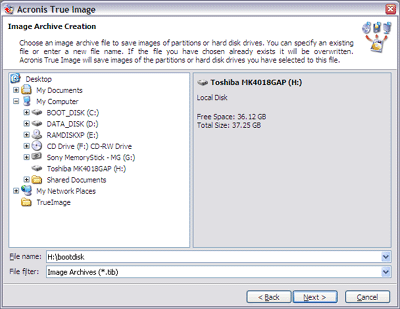
After selecting a partition or partitions, you then choose where you want to save the image file. If you select multiple partitions then True Image will perform operations on one partition a time with the same settings. True Image can backup your partitions to virtually any drive you can see in your Windows Explorer. As you can see it’s not limited to drives but also network shares and optical disk drives as well.
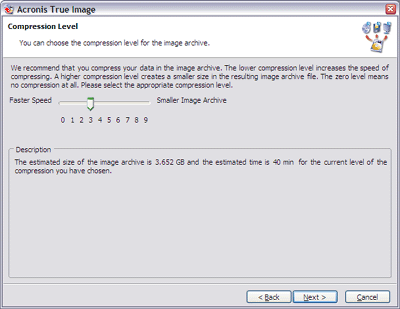
Once you’ve selected your destination, you can choose to compress the data to save space. The slider lets you choose various compression levels. Note that the more compression you use, the longer it will take to backup the partition. Generally speaking, the default settings gives you the best overall compromise in terms of size and speed. If you have voluminous disk space then no compression will speed things up.
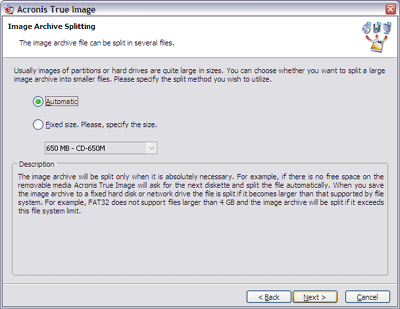
The next screen allows you to choose if you want the archive file to be one monolithic file or several smaller sizes. Even if you choose automatic, note that you will be limited by the media you are choosing. For instance, if you have 6GB to backup then it will create a single 6GB file on an NTFS drive. However, it will create a 4GB and a 2GB file on a FAT32 drive since FAT32 only supports up to 4GB file sizes. You also have the option to split files into floppy, ZIP Disk, 650MB CD-ROM or 700MB CD-ROM sizes.
You can now optionally enter a password to protect the volume from being loaded onto another system. You can leave it blank if you wish.

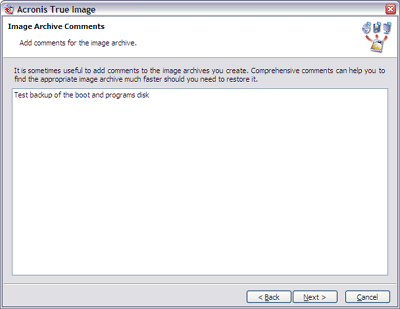
The last step allows you to leave a fairly lengthy comment about the archive so it’s easier for you to figure out what’s inside of an archive when you’re searching for the right backup. I typically put in the date and a description of what is in the archive and why I’m backing it up.
You get one last chance to review all the choices you have made before committing to the backup.
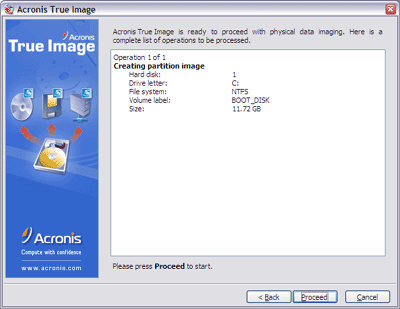
Once the backup starts, the program will give you an approximate estimate of the operation and how long it will take. Generally speaking, the estimate is pretty good but it can be affected if you’re having other disk operations going on. Although Acronis states that you can still use Windows while the backup is occurring, I think it’s better to let it do its work unhampered by system activity.
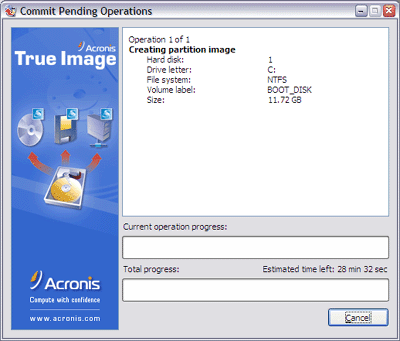
So, about 30 minutes later my system is backed up and I can start working without needing to reboot the system.
Now, once you have this file, you can use Acronis to extract individual files or the entire partition.
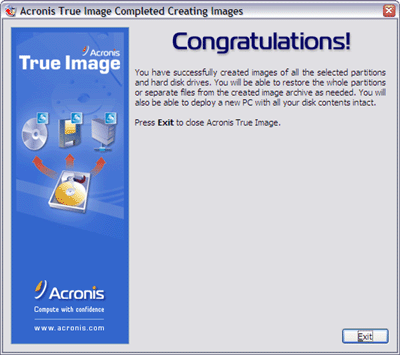
In my case, if I wanted to restore the partition I would need to use Acronis’ boot CD to boot the system and then I would point it to my external hard disk and then restore the system. As you can see, the boot CD interface is almost exactly like the Windows client so there’s no chance of getting confused or lost in the process. Yup, that’s Linux you see there! I would have posted more of the boot environment but I swear that the interface screens completely mimic the Windows environment screens. Restoration steps include pointing the software to the correct archive file and then selecting the destination. That’s it. Let it run and then reboot the system and voila! You’re done!
Final Thoughts and Comments
I highly recommend Acronis True Image and it’s an application you should have if you’re serious about backing up your system and your important data. One great use of the software is using it to take complete snapshots of your system periodically. For instance, I keep a few versions of my backups around.
The first is always the baseline backup that has the system in a pristine state (with all service packs and base OS updates at the time). The second is always a clean system with most of my commonly used applications installed. The great thing about these backups is that the restore process is a lot faster than restoring my system from scratch or from a manufacturer’s restore disks. The setups are also already configured to my liking and I don’t have to reinstall applications (which is a laborious process) and lookup all of my install CDs and activation keys.
Third is then periodic backups of the system before any major changes or every couple of months. This is my safety net just in case I was working on a project and need to get back to a certain point in time. Utilizing the comments feature of True Image allows me to more easily remember what I was doing when I made the backup.
As much as I like it, it does have one big issue that I’d like to see addressed. For all of it’s strengths, I find it odd that the program does not give you an option to verify the data during or after a backup to ensure data integrity. Considering it is “backup softwareâ€, it should be a standard option. It may slow down operations but it’s worth it. It’s a whole lot better than spending all of this time to backup a partition only to find out that you can’t get your data out of it. Despite my “issueâ€, I have yet to have a failed partition so either I’m lucky, the software simply works, or it has verifies built into the software. I’ll continue to investigate that further.
Update (2003.10.28): Acronis let me know that they do have a stand-alone verification tool located here which will be integrated in the next version of the software.
Although I’d like to see the ability to schedule backups, it’s not a crucial must have feature since other kinds of backup programs offer this functionality.
You can find out more information about Acronis True Image at http://www.acronis.com/products/trueimage/ and it costs $49.99 boxed or $44.99 for the download version. As an incentive to customers using a competitive product, users of Norton Ghost can get a huge discount and receive the software for $9.99!

